
Hair Oils, Serums, Curl Care, and Everyday Routines
HAIR CARE GUIDE
Choosing Hair Oil
The right oil depends on its texture, the amount used, and where it is applied.
The Everyday Hair Care Guide is an independent English-language information guide for readers comparing everyday hair-care choices. The focus is on practical distinctions you can use to judge what is relevant to your own hair.
Everyday Hair Care Guide
Hair Oil and Everyday Hair Care
The Everyday Hair Care Guide is an independent English-language information guide for readers comparing everyday hair-care choices. It offers no products or services. Its topics explain how oils and other methods relate to different concerns without treating one routine as right for every head of hair. The focus is on practical distinctions you can use to judge what is relevant to your own hair.
What hair oil can do
Hair oil is an optional part of a broader hair-care routine, not a complete routine by itself. Its formula determines how it feels and behaves: lighter oils tend to leave less residue, while richer blends can feel more coating. The amount matters too; a small amount may add slip or shine, — including a look at Smash — whereas excess can make strands look flat or greasy. Placement changes its role: scalp application concerns the skin at the roots, while use on mid-lengths and ends targets the hair fiber. Texture influences how visible that coating feels; fine strands can lose movement sooner than dense, coarse, or tightly curled hair. For hair oil for different hair types, consider formula, quantity, placement, and hair porosity together rather than choosing by a single label. Oil may smooth the surface and reduce friction, but it does not restore a split or broken hair fiber.
How to use this guide
Each topic addresses a different practical question, so the most relevant comparison depends on your current hair-care concern. Choosing and Using Hair Oil compares oil types and textures; Hair Serums and Their Uses and Hair Oil or Hair Serum explain how those formulas differ in purpose. Curly Hair Care and Curly Hair Products focus on curl-specific care and product roles, while Ways to Get Curly Hair compares approaches to creating curls. Building a Hair Care Routine and Hair Care by Texture and Goal address routine choices for different needs. At-Home Steam Treatments covers steam methods and preparation. Treat these comparisons as starting points: match the topic to your concern, then favor the simplest option that suits your hair.
Choosing and Using Hair Oil
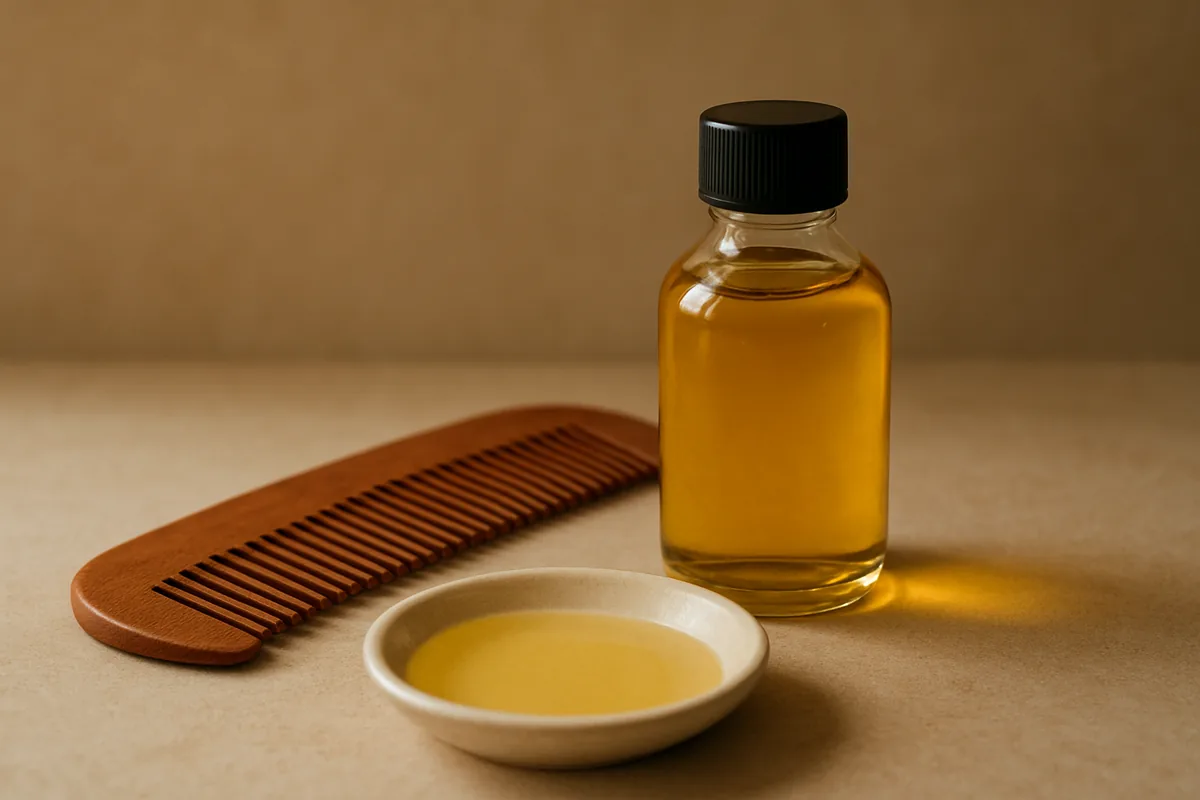
The right oil depends on its texture, the amount used, and where it is applied. A formula that feels comfortable on dense curls may leave fine, straight strands looking weighed down. Hair oil for different hair types is best chosen by observing how your own lengths and scalp respond, rather than relying on a single rule. The guidance below compares common textures and explains how to adjust application. For more detail, use a focused hair-oil selection and application guide when comparing formulas.
Oil types and textures
Carrier oils range from fluid, quick-spreading liquids to viscous oils that leave a more noticeable coating. These differences affect how easily a formula distributes and how much residue may remain.
- Jojoba oil has a relatively fluid feel and spreads readily in small amounts, making it a useful option when heavier oils tend to flatten fine hair.
- Argan oil is a medium-weight choice often used on dry or damaged lengths; apply sparingly at first to judge whether its finish suits your strands.
- Coconut oil can feel richer and more coating than lightweight oils, so dense or coarse hair may tolerate its texture better than fine hair.
- Castor oil is notably thick and slower to spread; formulas often blend it with lighter carrier oils to make distribution across the hair easier.
- Straight and fine strands may show residue sooner, while thick, wavy, or coily hair can often accommodate richer textures across more sections.
For hair oil for fine hair, favor a fluid texture and begin with a minimal amount. A richer blend may suit curly hair when its density and strand feel can carry the added coating.
Application basics
Start with one or two drops for short or fine hair, then add one drop at a time if the lengths still feel rough or look dull. Longer, thicker, or coily hair may need more, but divide it into sections rather than pouring oil directly from the bottle. Rub the oil between your palms until it forms a thin, even film; this helps prevent one patch from receiving most of the product.
For dry ends, smooth the oil over the last few inches of hair, where friction and dryness may be most noticeable. On wavy or straight hair, keep the first application away from the roots if volume matters. If applying to the scalp, part the hair into narrow rows and use a few drops across the chosen areas; a brief, gentle scalp massage helps distribute the oil without soaking the roots. Adjust placement according to whether the scalp or lengths feel dry.
Check the finish after the hair has settled: excess shine, separated strands, or a coated feel usually means the next application should use less or stay farther from the roots. Start small, place oil only where needed, and adjust based on the result.
Hair Serums and Their Uses
Hair serums are leave-on formulas designed for either the scalp or the hair shaft, and their placement affects how they fit into a routine. Scalp formulas are usually applied in narrow parts, while strand formulas are spread over selected lengths and ends. Their textures range from watery liquids to oils and silicone-rich fluids. Ingredient labels can help distinguish these formats and identify the feel or finish a formula is designed to provide. In Comparing serum options, placement, consistency, application format, and label details are useful criteria for product selection.
Scalp and strand formulas
Scalp-focused serums are made to be placed on the skin between the hair roots, not coated over the full length. Their typically fluid textures—such as a thin liquid or light gel—can be dispensed with a dropper, nozzle, or pump, then distributed in a few parts. A pointed applicator can make placement easier through dense hair. Depending on the label, apply one to a clean, dry or towel-damp scalp before styling; follow the product directions for whether it stays in or is rinsed out.
Strand-focused serums are intended for the hair shaft, often from mid-lengths to ends, where they can add slip or change the surface finish. They may feel silky and lightweight, or richer and more oil-like. Pumps and droppers are common formats; spread a small amount between the palms before smoothing it over the selected areas. These formulas are generally positioned after washing and conditioning, on damp hair before styling or on dry hair as a finishing step. Keeping scalp and strand formulas in their intended areas helps avoid applying a heavier texture where a lighter one is preferred.
Comparing serum options
Compare products by where they go, how they feel, and how their packaging supports accurate placement. The table outlines common formula types and label details to check before choosing one.
| Formula type | Intended placement | Consistency and format | Ingredient-label considerations |
|---|---|---|---|
| Water-based scalp serum | Scalp, applied along parts | Thin liquid; dropper or narrow nozzle | Water and humectants such as glycerin may appear; check the full ingredient list for components you prefer to avoid. |
| Oil-based scalp serum | Scalp in small, targeted amounts | More slippery; dropper or pump | Look for listed plant oils and note how rich the formula feels for your preferred scalp finish. |
| Silicone-based strand serum | Mid-lengths and ends | Silky fluid; usually a pump | Check for silicones such as dimethicone, which contribute to a smooth-feeling finish. |
| Oil-based strand serum | Lengths and ends | Oil-like; dropper or pump | Compare the listed oils and choose a texture that suits the amount of hair being coated. |
Packaging also matters: a narrow nozzle can target the scalp, while a pump helps dispense a repeatable small amount for the lengths. For practical selection, match the formula’s placement and finish to the area you want to address, then follow its label directions.
Hair Oil or Hair Serum
Hair oil and hair serum can both add slip and shine, but their formulas and intended uses are not identical. Oils are usually made with plant oils or oil blends, while serums may combine silicones, oils, and conditioning ingredients in a light, smooth formula. Some products cross these boundaries, so the ingredient list and directions matter more than the label alone. Compare the finish you want, the area you plan to apply the product, and how much weight your hair can handle.
Different roles
Hair oils are lipid-rich products that can soften dry-feeling strands, reduce friction during detangling, and add a glossy finish. Their weight depends on the oil blend: a few drops of argan or jojoba oil feel different from a richer coconut oil formula. Some are intended for lengths before shampooing, while others are designed to be used sparingly on dry ends. An oil’s presence alone does not indicate whether it suits the scalp or the hair shaft; check the product directions.
Serums are typically designed for a smooth, controlled finish. Many contain silicones such as dimethicone or amodimethicone, which coat the hair surface and help strands slide past one another; some formulas also include oils or water-based conditioning ingredients. Their texture may feel slick without being as lipid-heavy as a pure oil, making them useful for taming flyaways or adding polish after styling. The categories can overlap: an oil serum may combine both, so compare the full formula and intended placement rather than relying on the word “serum” or “oil.”
Choosing by hair need
For scalp use, choose a product specifically labeled for the scalp and follow its directions; a lightweight oil may suit a brief pre-shampoo application, while a leave-in serum is usually intended for the hair surface. If your scalp becomes coated easily, keep richer oils away from the roots. For dry lengths and ends, a small amount of oil can add softness, while a serum can provide slip and a smoother feel without the same oily finish. Hair oil for curly hair may work well in small amounts on dry ends, but curl density and strand thickness affect how much feels comfortable.
For styling, use a serum when you want a sleek surface or more controlled flyaways, and choose an oil when you prefer a supple, more visibly glossy finish. Fine strands often do better with lightweight oils or a low-dose serum applied from mid-lengths downward; thick or coarse hair may tolerate richer textures. For finishing, start with one drop of oil or a small pump of serum, distribute it between your palms, then smooth it over the ends and surface rather than layering it at the roots.
Placement and texture at a glance: scalp products should be explicitly suitable for that area; lightweight formulas suit fine hair and root-adjacent use; richer oils generally fit lengths and ends; serums often suit surface smoothing; oils tend to give a more oil-rich sheen. Choose by finish and placement, then begin with the smallest amount that covers the area.
Curly Hair Care
Curly hair routines work best when cleansing, conditioning, detangling, and styling are adjusted to the hair’s texture and the way it is worn. Curl pattern can affect how quickly roots feel oily and how readily lengths tangle, but it does not set a universal wash schedule. Product texture also matters: a lightweight leave-in may suit loose curls, while denser curls may respond better to richer, more cushioning formulas. Small changes to wash timing or styling method can help identify what gives curls definition without weighing them down.
Cleansing and conditioning
Choose cleansing frequency by scalp comfort, styling habits, and buildup rather than by curl pattern alone. Some people prefer washing every few days, while others can go longer; sweat, frequent workouts, or several layers of styling product may make a sooner wash feel better. If roots feel coated or curls lose their usual bounce, review product use and cleansing timing.
Apply shampoo mainly to the scalp and let the rinse clean the lengths, avoiding rough rubbing that can increase tangles. Work conditioner through the mid-lengths and ends, where curls often need more slip; apply closer to the roots only if that suits the hair’s texture and does not leave it flat. Rinse until the hair feels clean rather than coated.
Detangle while the hair is damp and coated with conditioner or a detangling product. Divide dense hair into manageable sections, such as four to six, then begin at the ends and move upward with fingers or a wide-tooth comb. This limits pulling through knots and makes it easier to reach the nape and inner layers.
Fine curls or loose waves may become weighed down by rich conditioners, while tight curls may need more slip to separate safely. Adjust one variable at a time—wash interval, conditioner amount, or product layering—so changes in softness and buildup are easier to notice.
Styling and curl definition
Apply styling products to damp or very wet hair, depending on how much slip and separation the curls need. Wetter hair can help distribute a cream or gel across each section; damp hair may be preferable when excess water makes the style too soft or slows drying. Test the amount of water and product on a small section before changing the whole routine.
Use fingers or a wide-tooth comb to spread product evenly, then choose a technique that suits the desired shape. Raking separates curls and encourages definition, while scrunching upward supports a more compact pattern. For clumps that tend to break apart, smooth product over a section between flat palms before gently scrunching the ends.
Product texture and hold affect the finish. A lightweight lotion or leave-in can preserve movement in loose curls; a gel or mousse usually offers more structure, which may help definition last through the day. Start with a modest amount, adding more only where sections look dry or undefined. Let the hair dry without repeatedly handling it, since frequent touching can disturb forming curl groups.
For guidance beyond these styling choices, consult the broader Curly Hair Care hub. A practical starting point is to style evenly distributed product on wet or damp hair, then adjust the formula’s weight and hold to match the curl pattern and preferred finish.
Curly Hair Products
Styling products shape curls by adding moisture, grouping strands, or helping a style keep its form. Their texture and hold determine how they feel on the hair and how much definition they can support. A lighter formula may suit curls that lose volume easily, while richer options can feel more comfortable on dense, coarse strands. Comparing product types makes it easier to choose a finish and adjust layers to your hair’s response.
Product roles
Leave-in conditioners are usually fluid or lotion-like, adding slip and softness without being rinsed out. They offer little hold, so they are often used as a base beneath a styling product. Creams are generally thicker and provide more coating and strand grouping; depending on their formula, they can soften frizz while leaving curls flexible.
Gels form a setting layer as they dry, giving curls stronger hold and clearer definition. Some leave a temporary cast that can be gently scrunched once fully dry. Mousses are aerated and lightweight, making them useful when you want lift and flexible control without a dense coating. Custards are typically richer, with a gel-like or creamy consistency; they can combine moisture with noticeable hold and curl grouping. Layering is not automatically better: several heavy products may weigh down fine curls, while a single light styler may not give dense curls enough control. Choose based on the finish you want and how your hair responds.
Comparing familiar formulas
These five product types cover different points on the spectrum from soft conditioning to stronger setting. Hold and definition are typical relative effects, not guaranteed results; formula, amount, and hair texture all influence the finish.
| Product type | Texture | Typical role | Relative hold | Definition and layering |
|---|---|---|---|---|
| Leave-in conditioner | Fluid, lotion, or light cream | Adds softness and slip | Low | Supports smoother grouping; works as a light base under a styler, but excess can leave fine curls limp. |
| Curl cream | Medium to rich cream | Softens and helps strands group | Low to medium | Creates a touchable, less crisp finish; may pair with gel when more lasting control is wanted. |
| Styling gel | Clear, fluid, or thick gel | Sets curl shape and limits movement | Medium to high | Often gives crisp definition and may dry to a cast; a cream beneath it can soften the feel, though layering can add weight. |
| Styling mousse | Light, airy foam | Adds body and flexible control | Low to medium | Can keep a fuller, lighter finish; layering with a small amount of cream may increase softness without a thick coating. |
| Curl custard | Thick gel-cream | Combines conditioning feel with styling control | Medium to high | Can encourage grouped, defined curls; its richer texture may suit dense hair better than hair that is easily weighed down. |
For a soft, airy finish, start with mousse or a light leave-in; for more defined, longer-lasting shape, try gel. Use a cream or custard when a richer feel suits your curls, and adjust the number of layers if they become flat or coated.
Ways to Get Curly Hair
Curls can be defined from natural texture or created with braids, rollers, or hot tools. The step-by-step guide, “Ways to Get Curly Hair,” covers these approaches from preparation through finishing. Start with clean, detangled hair and choose a method that suits its length, density, and texture. Section size, setting time, and product hold all influence the shape and longevity of the result. Results vary with hair texture and method, so adjust technique rather than expecting one approach to work identically for everyone.
Heat-free methods
Heat-free styling can encourage natural waves or create curls without a heated tool. Begin with damp, detangled hair rather than soaking-wet strands; apply a small amount of mousse or styling cream for flexible hold, then divide hair into even sections.
- Braid-outs: Make two to eight braids on damp hair; smaller braids create tighter bends, while larger sections produce broader waves. Leave them in overnight or until fully dry.
- Twist-outs: Divide each section into two strands and twist from roots to ends. Use smaller sections for more definition, then unravel only after the hair is dry.
- Rollers: Wrap one- to two-inch sections around foam or Velcro rollers, keeping ends smooth. Allow 30–60 minutes or longer, until the roots and lengths are dry.
- Flexi rods: Wind narrow sections from the ends toward the scalp around flexible rods. Smaller sections and a snug wrap generally create a tighter, more uniform curl pattern.
- Pin curls: Coil one- to two-inch sections against the scalp and secure each coil with a clip. Let the set dry completely before removing pins to limit frizz.
- Scrunching: Apply mousse or gel to damp waves, scrunch upward with your hands, and air-dry or diffuse on low airflow. This enhances existing bends rather than making uniform curls.
Keep sections consistent within each set, and avoid undoing braids, twists, or rollers while hair still feels cool or damp. Once dry, separate curls gently with fingertips and use a light finishing spray if extra hold is needed; brushing can loosen the pattern.
Heat styling and aftercare
Prepare hair by detangling it and drying it fully before using a curling iron or wand; hot tools on damp strands can cause uneven styling and unnecessary stress. Apply a heat protectant evenly, following its label for whether it belongs on damp or dry hair, and let any wet coating dry before styling.
Choose the lowest temperature that forms a curl. A starting range of about 250–300°F suits many fine or fragile strands, while medium or coarse hair may need roughly 300–375°F; individual results differ, and higher heat is not automatically more effective. Use a barrel around 1–1.5 inches for looser curls or waves, and work with sections no wider than the barrel.
Wrap each section smoothly and hold it for about 5–10 seconds, then release the curl into your palm and let it cool before separating. Alternate the direction of curls for a less uniform finish, or curl sections away from the face for a consistent sweep. A flexible-hold spray can help set the shape without making strands feel stiff.
After styling, wait until hair is completely cool before combing through with fingers or a wide-tooth comb. Keep brushing minimal, and use a small amount of leave-in conditioner on dry ends between wash days if they feel rough. Texture, length, section size, and tool choice change the outcome; for a practical starting point, use a lower setting and smaller sections before increasing either.
Building a Hair Care Routine
A workable routine follows the order in which products can clean, condition, detangle, and shape the hair. The right frequency depends on how quickly the scalp becomes oily, how much styling product is used, and how the lengths respond to washing. Most routines need only a few regular steps, with treatments added when a specific need arises. Keep the sequence consistent, then adjust one step at a time to see what improves comfort, manageability, or style hold.
Core routine steps
Start with cleansing and conditioning, then detangle and style in an order that suits the products and tools you use. A weekly mask or pre-shampoo treatment can be optional rather than a required step.
- Wet the scalp and hair thoroughly, then massage shampoo into the roots with fingertips; let the lather rinse through the lengths rather than rubbing them together.
- Apply conditioner mainly from mid-lengths to ends, leave it on for the time stated on the label, and rinse until the hair feels clean rather than coated.
- Detangle while conditioner is present or after rinsing with a slippery leave-in; begin at the ends and work upward using fingers or a wide-tooth comb.
- Blot excess water with a soft towel or cotton T-shirt, then distribute leave-in conditioner through damp lengths if they need extra slip or softness.
- Apply styling products to damp or towel-dried hair according to their texture; use a small amount first, adding more only if coverage or hold is insufficient.
- Air-dry or use a dryer with a diffuser or nozzle as appropriate; once the hair is dry, a light finishing product can smooth flyaways or add shine.
- Add an optional treatment before shampooing or after cleansing as directed; a rinse-out mask replaces or supplements conditioner only when its label says so.
Keep products that rinse out separate from leave-ins, since their formulas are designed for different stages. For a simple routine, shampoo, conditioner, careful detangling, and one styling product may be enough.
Adjusting by hair needs
Let scalp condition guide cleansing frequency: roots that feel oily or product-coated may need washing more often, while a comfortable, dry-feeling scalp may suit a longer interval. Sweat, frequent exercise, and heavy styling products can also make an earlier wash useful. If residue persists after rinsing, use less product or cleanse more thoroughly rather than adding another layer.
Texture affects how the lengths handle water and friction. Fine hair can lose lift when conditioner or styling products are concentrated at the roots, so keep richer formulas on the ends and use modest amounts. Thicker or curlier lengths may benefit from more conditioning and section-by-section detangling, while straight hair may need less product to avoid a weighed-down finish.
Heat styling, swimming, and frequent hold products can change the order or frequency of care. On a styling day, apply leave-in and heat protectant before using hot tools, following the product directions; after a day with substantial buildup, prioritize cleansing before restyling. If the scalp remains comfortable and the hair stays manageable, keep the schedule; if not, adjust wash intervals or product amounts one change at a time. The most practical routine is the simplest sequence that keeps the scalp comfortable and the lengths easy to manage.
At-Home Steam Treatments
At-home steaming uses warm moisture to support a conditioning treatment on the hair. It can be done with a warm towel or a hooded steamer, and each approach needs a little preparation. The method differs from applying oil: steam adds warmth and moisture, while oil is a separate product applied to hair or scalp. The right setup depends on the tools available and the time you can comfortably set aside.
What steaming involves
At-home steaming is a conditioning method in which warm, moist air or a damp, warmed towel surrounds the hair for a limited period. The warmth can soften the feel of conditioning products and help keep hair hydrated during the treatment, but results vary with hair condition, product choice, and technique. It is not a cleansing step, and it does not replace shampooing or rinsing.
Steaming fits after cleansing, when hair is damp and a conditioner or mask has been applied according to its label. A session commonly lasts about 10 to 20 minutes; follow the device instructions when using a steamer. Oil is different: it is a product, not a source of steam. You may choose to use oil at another point in your routine, but applying oil alone does not create a steaming treatment.
Methods and preparation
Before starting, cleanse and detangle as needed, then apply a conditioner or mask in sections so it reaches the lengths evenly. Keep a timer nearby and gather a shower cap, towel, or steamer before beginning. Use only a comfortably warm towel or the temperature settings specified by the appliance; avoid letting hot surfaces touch the scalp.
For a warm-towel method, cover conditioned hair with a shower cap, soak a clean towel in warm water, wring it out thoroughly, and wrap it over the cap. When the towel cools, rewarm it if desired; keep the total session around 10 to 20 minutes. A hooded steamer provides steady vapor without repeatedly reheating a towel. Sit beneath the hood for the period stated in the device instructions, often about 10 to 20 minutes, and do not exceed the maker’s limit.
The natural-hair article compares these approaches: a towel uses common household items and needs occasional reheating, while a hooded steamer offers more consistent exposure but requires equipment and a suitable setup. Choose the method that is easiest to control and follow its timing instructions; a warmed, well-wrung towel is a practical starting point.
Hair Care by Texture and Goal
A useful routine accounts for strand thickness, overall density, curl pattern, and the condition of the scalp and lengths. These traits can influence how much product feels comfortable and where it works best, but they do not predict an identical result for everyone. Formula weight and styling goals matter too: a product that smooths coarse ends may weigh down fine roots. Adjust one variable at a time, such as dose or placement, and observe how your hair responds.
Fine, thick, and textured hair
Strand thickness describes the width of an individual hair; density describes how many hairs grow across the scalp. Fine strands may become limp when coated with a rich oil, even in a dense head of hair, while sparse, coarse strands may tolerate a more substantial formula. If fine hair needs slip or shine, start with a drop of a lightweight oil, warm it between your palms, and smooth it over the last few inches. Keep the dose small and check the result before adding more.
Thicker strands can sometimes handle a richer product, but density and curl pattern still affect distribution. For tightly curled lengths, sectioning the hair and smoothing a small amount over each section can help reach the ends without saturating the roots. If a style needs volume, use less product near the crown; if the goal is to soften dry-looking ends, concentrate application there. Compare options in Hair Oil and Everyday Hair Care, and find curl-specific cleansing and styling choices in Curly Hair Care.
Scalp, lengths, and styling
Product placement should match the intended result. Applying oil to the lengths can add slip and shine, while a scalp formula belongs at the roots and should be used according to its directions. For a pre-shampoo treatment, distribute a modest amount through the areas that feel dry, leave it for the time stated on the product, then shampoo; this differs from a finishing application on dry ends. Jojoba oil for scalp care and richer oils for lengths serve different purposes, so consider the formula rather than assuming one product suits both areas.
For a smooth finish, use a small amount on the mid-lengths and ends; for curl definition, distribute compatible products through damp sections before styling. A serum may suit a targeted scalp or strand concern, whereas oil is often chosen for lubrication and softness. Hair Serums and Their Uses and Hair Oil or Hair Serum explain those distinct roles; Curly Hair Products covers styling options, while Building a Hair Care Routine helps organize steps. Start with the smallest useful dose, then adjust placement to improve the finish without flattening the style.
Who This Guide Is For
This independent reference is for readers comparing hair-care methods and product types before choosing an approach. Its topic areas separate questions about oils, serums, curl care, styling, and routine-building so you can focus on the choice in front of you. Each comparison highlights practical trade-offs, such as formula feel or where a product is used, rather than promising the same result for every head of hair. Start with your main concern, then use the relevant topic to narrow your options.
Finding the relevant topic
Start with the decision you need to make. Questions about oil ingredients, textures, or how to use a product fit the oil-selection and application topics; questions about scalp and strand formulas belong with the serum comparisons. If you are unsure whether an oil or serum better matches a particular need, the comparison of their roles is the relevant starting point. For curl concerns, look to the topics on cleansing, conditioning, definition, product roles, and heat-free or heat-based styling. Readers shaping a broader schedule can use the routine and at-home steam topics, while the texture-and-goal comparisons address distinctions such as fine versus thick strands or scalp versus lengths. A hair oil for fine hair and a hair oil for curly hair raise different comparison questions, so begin with the topic closest to your texture and goal.
Using comparisons practically
Compare formulas by ingredients and finish, then consider whether the texture seems compatible with your strand diameter and styling preferences. A lighter-feeling blend may be easier to incorporate into fine hair, while a richer formula may suit someone seeking more substantial conditioning; neither description guarantees a particular result. Hair porosity, product amount, and whether the formula is placed on the scalp or lengths can also change how it feels. Consider application and styling together: a product that leaves a noticeable coating may behave differently under a blow-dryer or alongside a leave-in cream than a lighter finish. Check whether the comparison concerns scalp care, pre-wash use, or styling, since those are distinct placements and purposes. Treat general guidance as a starting point, not a prediction for every head of hair. For a practical choice, match one product to your main need and compare its feel over two or three wash cycles before changing several parts of the routine.